Granite countertops contribute to the appeal of your kitchen. Shiny, tough, and bearing load, they are a staple in your kitchen. But, despite all the toughness, they are prone to damage if not handled properly. A minor crack, chip, or wear immediately turns into an eyesore. Fixing these cracks is the only solution. And the good news, it’s not that difficult. Let’s see how you can repair a crack in your granite countertop to keep it looking as spotless as it was installed yesterday.
Understanding Granite Cracks
Granite countertops are pretty solid and durable, but cracks can still surface. Knowing why and how to spot them is key to quick fixes.
Common Causes
Cracks often stem from heavy impacts, like dropping a pot or thermal shock from hot pans placed directly on the surface. Poor installation, such as uneven support or inadequate load-bearing structures, can also stress the stone, leading to fractures. Settling foundations or excessive weight on edges may cause splits over time.
Identifying Cracks
Look for a straight line or jagged breaks, especially near sinks or corners. Run your finger over suspect areas. Rough or uneven spots signal damages needing repair. If your kitchen includes limestone surfaces, professional limestone cleaning can help identify similar vulnerabilities before they worsen.
Steps to Repair a Crack in Your Granite Countertop

Fixing a crack running in your granite countertop might seem challenging, but with the right tools and a steady hand, you can restore its beauty and strength. These steps will guide you through the repair process, be it a hairline crack, a chip, or a broken piece. Let’s dive in and get that granite countertop looking flawless again.
1. Preparation
Before you start, a clean workspace is key to a solid repair. Granite is tough, but cracks need a pristine surface for the repair materials to stick properly.
- Clean the area with acetone: Grab some acetone and a soft cloth. Wipe down the cracked area thoroughly to remove dirt, grease, or crumbs. Acetone cuts through grime without leaving residue, unlike soap and water. Work in a well-ventilated area because acetone fumes are strong. If you don’t have acetone, isopropyl alcohol (90% or higher) can work in a pinch.
- Dry thoroughly for proper adhesion: After cleaning, let the area dry completely. Use a clean, dry microfiber cloth to wipe away any remaining acetone. Moisture is the enemy of adhesion, so don’t rush this step. If the crack is deep, use a hairdryer on a low setting to ensure every crevice is bone-dry. A dry surface ensures your repair materials bond tightly to the granite.
This prep work sets the stage for a durable fix, so take your time. Rushing leads to sloppy results.
2. Fill The Hairline Cracks and Chips
For hairline cracks or small chip repairs, you’ll need a strong, clear filler that blends well with the granite or quartz countertop’s natural shine. Two options stand out: epoxy resin and acrylic repair kits. Each has its strengths, so choose based on the crack’s size and your comfort level.
- Epoxy Resin Filling: Epoxy glue is the go-to for most granite repairs because it’s durable and can be tinted for a color match with your old or new countertop’s shade. Mix a two-part clear epoxy super glue according to the package instructions, usually a 1:1 ratio of resin and hardener. If your granite has a specific color, add a drop of natural stone pigment (available at hardware stores) to the mix. Use a toothpick or small spatula to apply the epoxy into the crack, pushing it deep to fill every gap. Overfill slightly, as it’ll shrink a bit as it cures. Smooth the surface with a plastic putty knife to avoid scratches. Let it cure for 24 hours, or as directed. Don’t touch until it’s fully set.
- Acrylic Repair Kits: For smaller chips or hairline cracks, acrylic kits are user-friendly and often come with pre-mixed formulas. These kits include a clear or tinted acrylic paste that you apply with a syringe or applicator. Dab the paste into the crack, ensuring it’s level with the surface. Acrylic sets faster than epoxy, often in 4-6 hours, making it great for quick fixes. However, it’s less durable for larger cracks, so use it for minor damage only.
Both methods work well, but epoxy is better for deeper or wider cracks, while acrylic suits superficial damage. Always wear gloves to avoid sticky messes, and work in a dust-free area to keep the repair clean.
3. Reattaching Broken Pieces
If a piece of your granite countertop has broken off, don’t panic. It’s fixable with careful steps. This process requires patience to ensure the piece bonds securely and blends with the rest of the surface.
- Support the broken section: Before applying adhesive, prop up the broken piece so it’s level with the kitchen countertop. Use a small block of wood or a stack of books to hold it in place. This prevents strain on the repair while the epoxy sets.
- Tape off all surrounding surfaces: Use masking tape to mask off the area around the crack. This protects the rest of the granite countertop from stray epoxy and keeps the repair neat. Apply masking tape 1–2 inches around the break, leaving just the damaged area exposed.
- Apply the first coat of epoxy: Mix a small batch of two-part epoxy, ensuring it’s tinted to match your granite if needed. Using a small brush or spatula, apply a thin layer to both the broken piece and the countertop’s edge. Press the piece into place gently, aligning it carefully. Wipe away any excess epoxy with a cloth dampened with acetone.
- Shim and tape the area: If the piece shifts slightly, insert plastic shims (or even folded paper) into the crack to hold it flush. Secure the piece with painter’s tape, pulling it tight to keep everything in place. Let this first coat cure for 12–24 hours, depending on the epoxy’s instructions.
- Apply the Second coat of epoxy: Once the first coat is set, remove the tape and shims. Mix another batch of epoxy and apply a second layer over the seam to reinforce the bond. Smooth it out with a putty knife, ensuring it’s level with the granite countertop. Let it cure fully, usually another 24 hours.
This multi-step approach ensures the broken piece stays put and the repair is nearly invisible.
4. Finish the Repair & Shine The Surface
Now that the crack is filled or the piece is reattached, it’s time to blend the repair with the rest of the kitchen countertop.
- Sanding the repaired area with fine-grit sandpaper: Use fine-grit sandpaper (600-800 grit) to gently sand the cured epoxy or acrylic. Sand in small, circular motions to smooth out any raised areas. Be careful not to scratch the surrounding granite. Keep your sanding focused on the repair. Wipe away dust with a damp cloth.
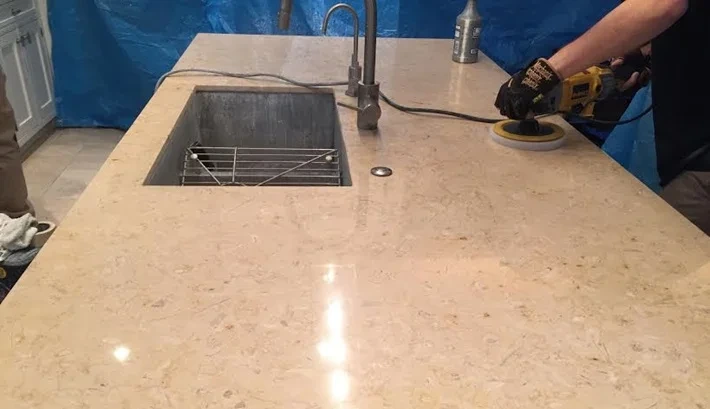
- Polishing to restore the countertop’s shine: Apply a granite-specific polishing compound with a soft cloth or a low-speed buffer. Regular marble cleaning can maintain the shine of marble countertops and prevent similar damage. Work in small sections, buffing until the repaired area matches the new countertop’s glossy finish. If you don’t have a polishing compound, a DIY mix of baking soda and water can work for minor buffing, but it’s less effective.
Step back and admire your work. The crack should be nearly invisible, and the countertop should gleam like new. If the repair still stands out, repeat the polishing step or consult a professional stone cleaning in Chicago for a final touch-up.
Maintenance Tips for Preventing Granite Cracks

Keep your granite countertop looking pristine and crack-free with simple habits. These practical tips will protect your investment and maintain its stunning shine for years.
Regularly clean with mild soap and water.
Wipe the surface daily with mild soap and warm water using a soft cloth. Avoid harsh chemicals like bleach, which can weaken the sealant. Dry thoroughly to prevent water spots or staining.
Seal the granite surface every 1–3 years.
Apply a granite sealant every 1–3 years to protect against moisture and stains. Test the seal by sprinkling water on the surface. If it beads up, you’re good; if it soaks in, reseal. Follow the sealant’s instructions for a smooth application.
Avoid placing hot pots directly on the surface.
Never place hot pots or pans directly on granite. Sudden temperature changes can cause thermal shock, leading to cracks. Always use trivets or hot pads under cookware.
Use trivets or hot pads under cookware.
Always use a buffer when setting down hot dishes or cookware. Trivets and hot pads absorb heat and reduce the risk of thermal shock to your granite surface.
Place cutting boards under knives to prevent scratches.
Knives can scratch granite, creating weak spots prone to cracking. To preserve the surface’s integrity, place a cutting board under your chopping block.
Wipe up spills promptly to prevent staining.
Acidic spills like wine, citrus, or vinegar can etch granite if left too long. Blot spills immediately with a soft cloth to prevent staining or surface damage. For nearby tiled areas, regular grout cleaning in Chicago can prevent dirt buildup that might weaken adjacent granite surfaces.
Check for signs of cracks or damage periodically.
Check your countertop monthly for tiny cracks or chips, especially near edges or sinks. Catching damage early lets you repair it before it worsens.
Conclusion
Repairing your granite countertop is easier than it seems before you tackle the problem. Restoring its beauty needs just a few careful steps. Regular maintenance like sealing, using trivets, and quick spill cleanups keeps cracks at bay. With these tools and habits, your countertop will stay a kitchen showpiece. Tackle that repair confidently, and enjoy a flawless surface that stands up to daily life.


