Sometimes, the protector also needs protection, especially if it’s about that tough and solid granite countertop. It deals with scratches, heated pans, chips, etc., that leave the stone with perpetual marks and signs of wear. If you don’t deal with them well, your countertop, which once was the center of attraction, loses its shine. However, replacing is not always a budget-friendly solution. So, there’s a better alternative called granite resurfacing. Let’s see what it is and how it works.
What is Granite Resurfacing?
Granite resurfacing is the process of restoring worn and rusty-looking granite countertops by repairing, sanding, polishing, and sealing the surface. Instead of tearing out your kitchen countertops and investing in new material, resurfacing revives the existing granite.
It’s like giving your countertop a facelift. Scratches, chips, and dullness can be treated so the stone regains its glossy finish. With the right tools and materials, homeowners can often tackle resurfacing themselves.
Why Resurfacing Matters
Granite is a tough material, but like every other stone, it can also chip, break, and crack. Over time, even well-maintained granite surfaces can lose their shine due to cooking spills, knife marks, or harsh cleaning chemicals.
Though an expert service for counter top maintenance in Chicago is a great choice, resurfacing is a budget-friendly option to cover up any damage due to these mishaps and maintain that first-day-like shine. But there are other reasons as well, like:
- Cost savings: Resurfacing is far more affordable than replacing countertops.
- Durability: Regular resurfacing strengthens the surface and prevents deeper damage.
- Aesthetics: A polished, stain-free surface makes your kitchen look fresh, clean, and inviting.
Who doesn’t love that look of a natural stone? But such stones can hurt your pocket. If you’re having a budget constraint but still want that natural stone look, resurfacing is for you.
Essential Tools and Materials for Resurfacing
Before you start, you’ll need the correct set of tools and materials. Here’s a checklist:
- Cleaning supplies: Mild dish soap, warm water, microfiber cloths, and a box cutter for scraping away stubborn food or caulk.
- Repair kit: Granite epoxy or filler for chips and cracks.
- Sanding tools: Sandpaper or an electric polisher with different grit pads.
- Polishing compound: Specifically designed for granite or natural stone.
- Sealer: A high-quality granite sealer with a strong top coat.
- Application tools: Countertop paint (if refinishing with color), paint tray, and paint roller.
- Protective gear: Gloves, goggles, and a dust mask.
Having the right tools makes the job smoother while ensuring the lasting durability of the granite.
Step-by-Step Guide to Resurfacing Granite Countertops
Though it seems exhausting, resurfacing granite countertops can become easier with these steps.
Step 1: Clean the Surface Thoroughly
Mix dish soap with warm water and wipe the surface with a soft cloth. You have to eliminate all the grease, stains, and leftover food to prepare a smooth, spick and span surface.
If there’s any old caulk or stuck-on debris, get rid of it using a box cutter. Without a smooth surface, you can’t achieve a smooth finish.
Once your granite countertop is clean and ready, dry it completely before moving further. There shouldn’t be any moisture left, as it can weaken the repair process.
Step 2: Repair Any Chips or Cracks
Scan your granite countertop thoroughly and identify if there are any chips, holes, or cracks. While they look trivial, these tiny issues can expand over time, and you don’t want that.
You can use a granite repair kit with epoxy filler. Follow the instructions to blend it right and carefully apply it to the damaged areas. Use a putty knife to smooth them out and let them cure fully.
Once the epoxy is dry, sand the repaired area gently. These new repairs should match the surrounding surface.
Step 3: Sand the Granite Surface
You do not paint a wall with a rough, uneven surface, right? Likewise, you shouldn’t polish an uneven granite countertop. You first need to sand it well to restore the smoothness and prepare the stone for silk-smooth results.
Begin with a coarse grit to remove any scratches or unevenness. Then move to a finer grit to give the surface a smooth finish.
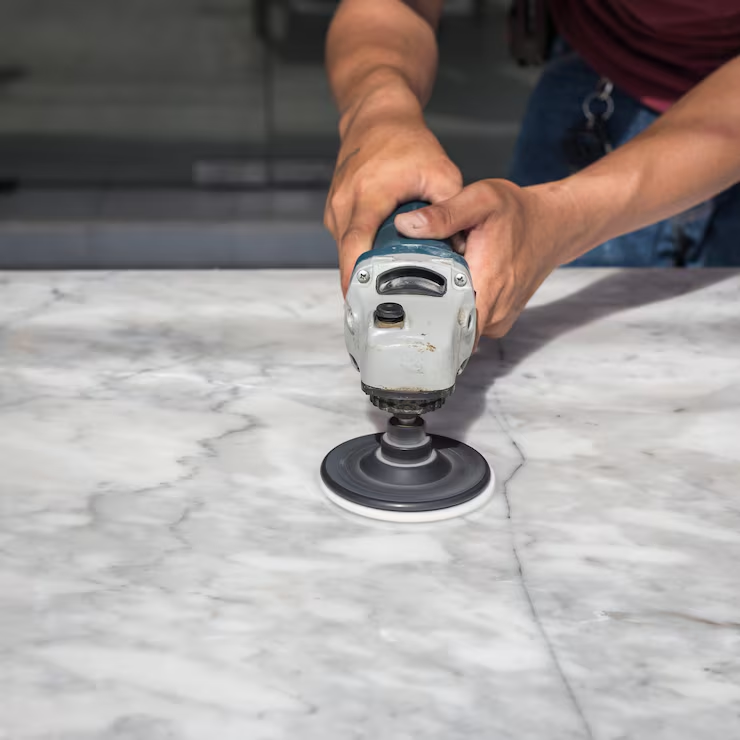
You can use an electric polisher with diamond sanding pads for the best results. Move the polisher in circular motions and be gentle. Applying too much pressure can lead to over-sanding, which results in heat damage, a cloudy surface, and an altered appearance.
Step 4: Apply a Polishing Compound
After sanding the granite surface, apply a high-quality polishing compound. Spread it evenly using the electric polisher and buff until the surface begins to shine.
This step revives the natural beauty of the stone and strengthens its durability. If you want that new shine and glow of your granite countertop back, pay more attention to this step.
Step 5: Seal the Granite Countertop
Granite is a porous material. Simply put, it has pores in it that can absorb stains from oil, wine, sauces, or other liquids. Skimping on sealing can lead to open pores, allowing these liquids to creep in and damage your granite countertop.
So, be extra careful while sealing the surface. Use a paint roller or soft cloth to apply the granite sealer in even strokes. Let it penetrate the surface for the recommended time, and once it’s absorbed, wipe off the excess. A good sealer creates a protective top coat that repels stains and moisture.
Step 6: Final Wipe and Inspection
Once you successfully seal the surface, give it a final wipe with a clean cloth. After wiping, check the surface under good lighting. There shouldn’t be any streaks, missed spots, or uneven patches left.
If all these steps are followed well and done right, your granite countertop will look refreshed, polished, and like it was installed yesterday.
Maintaining Resurfaced Granite Countertops
Resurfacing your granite countertop is one thing, but maintaining it is another. If you don’t upkeep the surface over time, daily wear will bring the surface to that old and rusty condition. Follow these quick steps to keep the surface in top shape.
Daily Cleaning and Care Tips
Basic but often overlooked, daily cleaning can save you time and stress that later comes when you deal with those stubborn, deep-seated stains.
- Don’t give any spills time to sit on the surface. Be proactive in cleaning any spills immediately with a soft cloth.
- For daily cleaning, use warm water with a mild dish soap. Stay away from those abrasive cleaners as they can scratch the surface.
- Place mats under hot pans and cutting boards under knives to safeguard the stone from any surface damage.
What to Avoid After Resurfacing
Successful resurfacing doesn’t mean you’re free to do anything on your granite countertop. There are some things you still need to avoid after the process, like:
- Using harsh chemicals like bleach or ammonia is a big no.
- Don’t drag heavy pots or appliances across the countertop.
- Stay away from acidic foods like lemon juice sitting directly on the surface for long periods.
How Often to Reseal or Resurface
Most granite surfaces need resealing every 12 to 18 months. However, heavily used kitchen countertops may require attention sooner.
To check, sprinkle a few drops of water on the surface. If the water beads up, your seal is still intact. If it soaks in, it’s time to reseal.
Cost to Resurface Granite Countertops
There isn’t a fixed cost of resurfacing granite countertops. It all depends on the size of your countertop, the level of damage, and whether you hire a professional or do it yourself.
Factors Influencing the Cost of Resurfacing:
There are numerous factors that can determine the actual cost of resurfacing, such as:
- Countertop size: Larger kitchens with more surface area naturally cost more.
- Type of repair: Simple polishing costs less, while repairing cracks or chips adds to expenses.
- Tools and materials: If you need to purchase an electric polisher, paint tray, or countertop paint, the costs increase.
- Professional vs DIY: Hiring professionals ensures a flawless job but can cost a bit more.
Average Cost Estimates for Different Resurfacing Methods:
Depending on the resurfacing methods, the cost can vary.
- DIY resurfacing kits can cost $150 to $300.
- Professional polishing and sealing can cost around $500 to $1,200.
- Full refinishing with countertop paint or white paint options can be more costly, somewhere around $800 to $1,500.
Additional Costs to Consider:
The entire resurfacing job isn’t as straightforward as you think. There are other expenses you must consider to avoid any later surprises.
- Replacement of severely damaged granite with marble or new countertops.
- Labor charges if complex repairs are needed.
- Extra sealant or top coat for high-traffic kitchens.
For optimal results, hiring services for marble cleaning in Chicago is your safest bet.
Tips for Budgeting and Cost-Saving Measures:
To make sure you don’t spend a fortune and still get a quality resurfacing job, you can follow these hacks:
- Buy resurfacing kits with bundled tools to save money.
- Handle minor repairs and cleaning yourself, but hire professionals for extensive cracks.
- Compare quotes from different contractors before choosing one.
- Resurface during off-season when contractors offer discounts.
Conclusion
Despite granite’s strength, the damage is inevitable. Over time, you will witness chips, cracks, or wear on the surface. But don’t let those signs of damage stress you out. Resurfacing is an easy, wallet-friendly method that can fix your granite countertop without a hefty investment. If the damage is heavy, it’s better to call a granite or limestone restoration in Chicago.